Let's begin with a very simple FX cycle.
In this case I've chosen a gooey energy field to animate. The style reminds me of the FX in Lilo and Stitch. All animated effects in the film have the nice look of
 being goopey, heavy, and thick. Watch the film see the water, fire, cake icing, and especially the laser blasts. Nothing has a sharp edge to it, the lasers have a highly stylized and glutinous feel to them.
Here we have a simple energy field cycle, let's break this down and start from scratch. It all starts with a nice classically animated cycle. This is where you'll spend most of your time, in getting the nice flowing, smooth cycle to work the way you want it.
First you draw it out, I use the brush tool, if you have a Wacom tablet it makes it easy to just draw free hand, straight-ahead, go back and adjust your line thickness/tapering later with the Arrow tool. The line is intended to be a little wobbly and random so don't be too concerned about a super clean line in this case, you have a deadline to meet remember?
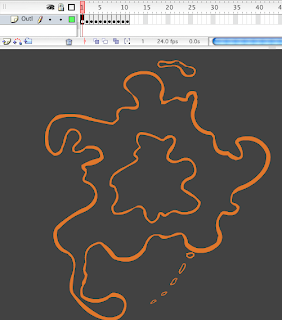
This takes the longest to do. In this case a brush outline, a bit of a wobbly clean line to make it look a little bit more organic, the line thickness varies but it's not too important in this case.
 The more time you spend on this simple 1-layer, 11-frame cycle the better the final product will look. Put that onion skin on and breakdown those drawings to get to what you want, the rest is all technical. Here a simple orange brush line was chosen. Drawn the middle for the simple interior core of the looping blobby animation...
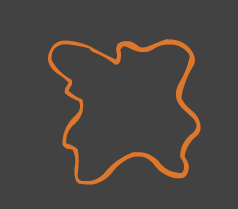
Then the more complex exterior pattern is drawn in. You see how the shapes blend in, the energy pattern recycles itself as it spins. Hand-drawn frame by frame.
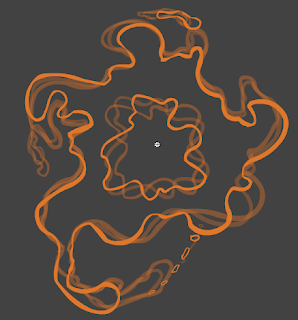
Make sure you're satisfied with your magical energy cycle animation, render it constantly, fix every glitch, make it a smooth transition from frame 11 to frame 1. A trick for that is simply copy your first frame on to the 12th frame and use the onion skin to make sure you draw your way to your final "pose". Then remove that last reference frame when you're all done. Most effects are usually all on 1s, but time/budget restrictions often have you cutting corners.
Step 2
Copy all the frames of your finished animation on to a new layer on top. Simply hit that "+"
 under your timeline on the left, then select all the 11 key frames, then hold down the Option key (or Alt for PC users) and drag it up to that new layer you just created. Bam! You've duplicated all your artwork onto a new overlay level. Name your layers to
 stay organized so it looks something like this shown on the right.
Now lock you bottom layer, make it invisible and work with your newly duplicated top layer.
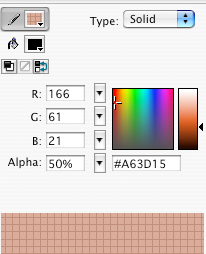
Choose the Ink Bottle tool and pick a 50% alpha color. In this case we've
 chosen a pale orange color.
Choose a thick outline from your properties window (5pt. should be good) and start clicking on all your paint.
This creates a nice overlapping orange partially-transparent outline overtop your animated paint lines. Do this for every frame,
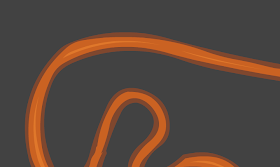 make sure you catch all the little bits of paint you might have made.
Now all you have to do is remove the original orange paint lines from this layer. Leave your original outline animation on that separate layer underneath, keep it locked and hidden. Now use the Edit Mulitple Frames button. Activate this tab and then drag the range finders that appear on your time line to cover the whole time line, this button is just two buttons the right of the Onion Skin button just below the timeline
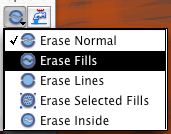
 bar. Now choose you eraser tool and change the properties of the eraser to Erase Fills from below the tool bar, zoom out as far as you can, and start erasing the whole screen. It will remove all the paint from all the frames from your one unlocked layer at once. Zoom back in, you now have "outlined" your animation with a frame-by frame semi-transparent line, it should look a bit blurry already looking at it at 100% with your bottom layer visible and the original animation line art showing through.
Step 3
Repeat the process. Make a new layer, put the layer on top of all others. Except copy the frames from the layer you've just completed into a new top layer. Lock all the layers except for this new top layer containing a duplicate copy of the layer under it. Now you can quickly re-outline all your animation with thicker and more transparent line with the Edit Mulitple Frames tab. Activate this button and then drag the range finders that appear on your time line to cover the whole time line.
If your layer is visible it should look like the madness shown below. Now go to Edit > Timeline > Select All Frames, choose your ink bottle with a thicker properties line (10 pt.) and use 25% alpha for your color, and click on any of the outlines you see to change all the color and thickness of your all your top layer's outlines at once. Make sure only this new top layer is unlocked. After just a couple clicks you've got a thicker/more see-through version sitting on top.
it should look like this:
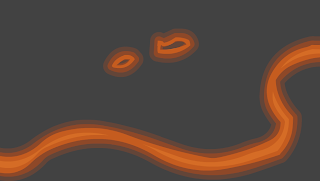
Zoom out and it will look like an animated orange fuzzy line.
Step 4
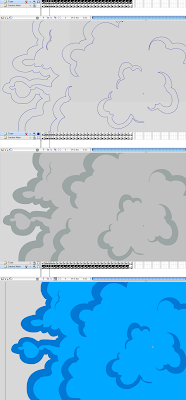
Making some masks. Take the original outline layer with your untouched brush-line animation, copy it again onto a new layer, move this layer underneath everything (even your outline animation). Same thing as before, select all frames, copy the frames, paste them onto a new bottom layer, now paint in all frame-by frame some other color (it doesn't matter what color). Keep the gap between the two blobs separated. Now Ctrl+click (or right click) this new bottom layer and change the layer properties to a Mask.
Step 5
Now to place some random stuff for the mask to show through.
In this case a bunch of differently-sized and placed 35% alpha white circles in a new symbol. Hit F8 (make sure it's a Graphic symbol) and start making spots with the Circle Tool, shift and move these shapes around every frame for all 11 frames. In this case we just moved them every 4th frame, therefore there was only 3 different positions the circles would loop in as shown below.
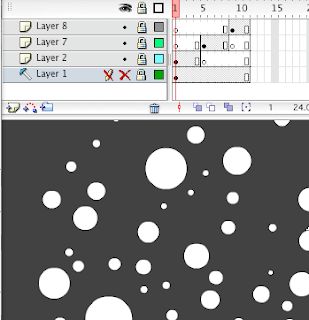 As shown here, it's on 4s. and at every 4th frame the circles switch around. Now bring this symbol into the main stage (make your Library visible return to the main timeline), make a new layer underneath the mask layer and ensure the layer is a "sub-layer" branching off under it. Drag you animated symbol from the library to the stage in the layer under the mask, size and place it so it covers all of it. Lock both the mask layer and the layer underneath to see the effects of the mask.
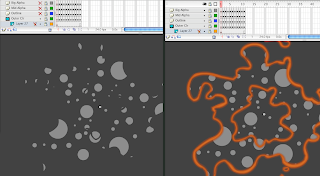 See above, your spots should only be visible through the paint of the mask, now make your top layers visible to see the full effect, if you scroll through the time line you'll see you animation boiling away with masked dots shinning through.
Click the image below, this is what it should look like if you make one layer visible at a time.
 Notice the locked Mask layer and sub layer, the fuzzy outline created from the multiple alpha layers, and the dancing spots isolated to where they should be.
Step 6
Now copy all the frames from your mask layer onto a new bottom layer (mind as well create a few extra layers underneath that, you'll need them later). Now (in this case) delete the middle blob frame by frame. You're left with the exterior blob animation. Make this layer a mask, create a new layer underneath it. Place a large box (covering the entire area the animation would cover) on the first frame with the Rectangle Tool.
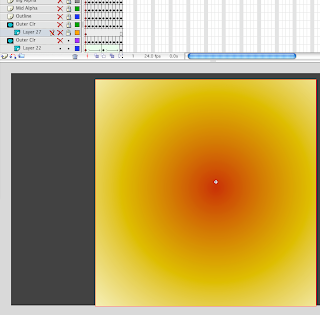
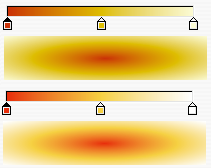 Create a radial gradient, in this case a fire-like yellow to red color works best. Click fill in the box. Go to frame 5 or 6 on your timeline and paint in a slightly different shade of white to yellow to red transition, move the tabs around to get the effect you like best, then paint in the box for your second keyframe. Make certain your last frame and first frame have the exact same color, copy and paste the frame over to be certain.
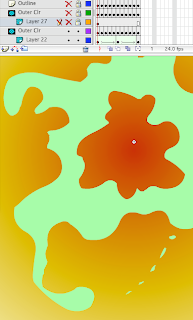 If you make your mask layer above your current gradient box layers visible but unlocked, you'll see the overlay of the animated blob over top of the gradient, if you scroll through the timeline it will pop to the new color gradient halfway through the timeline while your animated mask will boil as usual overtop.
Step 7
Repeat this step again but this time remove the outer rim animation, leaving the middle blob. Instead of a light color scheme for the gradient, use a darker red combination.

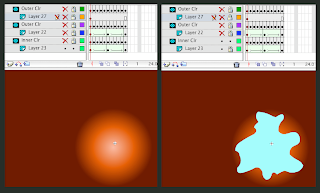 Same process. Place a large box on the fist frame, paint it the radial gradient you choose, keyframe it halfway down the timeline, alter the color slightly and re-paint, then re-use the first frame to copy it into the last frame.
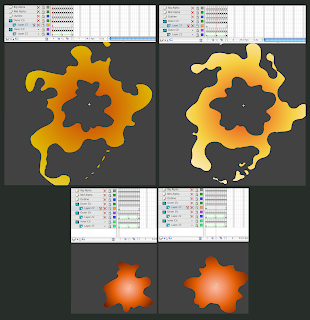 Shown above is a display of the first and middle keyframe for each blob with all layers locked to see the effects of the gradient punching through like a frame-by-frame cut out. If you make all your layers visible for a moment, you'll see the fact that the polka dots above are alpha, and the outline art with its thick alpha lines overtop are all composited on separate overlays showing how nicely it's coming along.
Step 8
Now all you need is to put a tween on the two gradient layers. Select one keyframe on the first layer with the gradient box and go to your Properties window and choose the Shape Tween. Do this to both the first and the middle keyframes on both layers with your radial gradient boxes.

Step 9
Test your effect. Render it out. See glitches in the shape tween? See flickers where there isn't supposed to be? Double check to make sure your Mask layers are overtop the elements you wish to be seen through. Your animated cut-out shapes should be the Mask layers the colors or circle shapes under them are what will be shown through. Make sure your shape tweens aren't trying to morph the shape of your color box, only creating a smooth transition from one radial gradient to another, to make that slow pulsating effect.
Presto! You're done!
The end result is a looping stylized energy pattern.
As shown below we converted the same design to a magical energy beam in our Olliver's Adventures episode in which we were spoofing DragonBall Z.
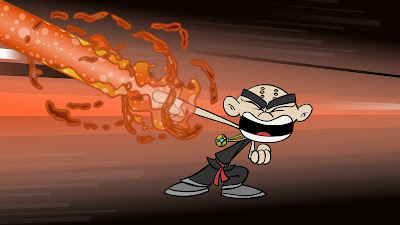
Clean-up your layers, label them properly, and then copy all the frames on all the layers into a new symbol, so now you can create a new layer and click and drag the main symbol of this self-contained animated effect from your Library to the stage, delete all the original layers and now you have a lopping effect that is isolated to one layer and one keyframe on your timeline. Copy/paste and re-size/rotate the effect over and over on the stage, select a few different versions and change when there animation starts from the Properties window to make it look like a multitude of several different plasma fields circulating. Making it appear like a more complex and in depth effect with only a singular 11 frame cycle of animation duplicated, with staggered timing and a variety of rotations and sizes.
Here's just a small sample montage of what Flash can do if you push the multiple-layers and gradients/alpha channels idea even further with a strong classical animation foundation.
And here's a sample of some simpler/cartoonier FX, showing a softer and more stylized look.
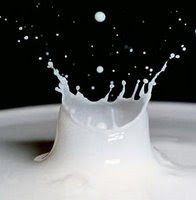 I hope this was informative. The key to a lots of these methods is 'layers', a series of very simple techniques are used above, separately they mean very little, once combined all together they can produce something with plenty of life to them. Like any style of animation the more layered the animation and the more time put into it, the better it gets. This is true for background art, timing and acting in character animation and of course in the sometimes abstract nature of effects animations. It all starts with experimentation and practice, experiment in drawing and timing your FX shots and always gather lots of references. Practice with posing out your 'keys' and 'extremes' just like character animation. Experiment with various timing methods like a fast burst out on 1s followed by tightly-spaced drawings on 2s for the slow settle/dissipation. The better your designs & poses the better your effects. Always have an accent in your FX cycle, whether it's smoke fumes, fire, energy beams, anything at all. Depending on how stylized or realistic your approach is, I personally have gotten used to animating 'straight-ahead' while doing simple short blasts of smoke and fire or plasma beams.
 Practice some 'ease-out-and-in' for the spacing of your drawings, especially for various levels and speeds of dissipation FX for your fire, smoke and water splashes. "Follow-thrus" and "over-shoots" apply to effects animation similar to character animation. Imagine a torch being swung around wildly, the fire on top of the torch will be trailing flame steaks dissipating behind it, following a path of action similar to a leather whip being swirled around. Imagine a big cartoony glob of goo being fired out of a canon, you'd even have an antic, a blast out action, the impact/splat and some drippage oozing off the surface it hit.
Rough out your fully animated effects, frame by frame, then make a new layer on top to clean and paint it like you would on paper. If you have a two-toned smoke animation, try to ink and paint the two tones on two separate layers, your thick colored outlines on top and the base color underneath. This will make it easier for you to re-color and re-use this smoke later on, as shown here on the right. Simply 'Edit Mulitiple Frames' ...widen the entire range on the timeline... hit Ctrl+A (or Cmd+A), lock all other layers except the layer you want to re-paint, choose your new color, and presto! Now do it to your next layer and you've quickly and easily changed the tones of your smoke for multi-purpose use.
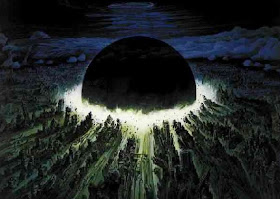
If you want to see some kick ass FX reference, watch Akira for mind-blowingly good explosions, smoke, and crumbling debris every where in the film.
 Here are some Animated Effects Notes I had scanned in years ago. We had accumulated 216 pages of photocopied class notes in the studio, and they are all valuable reference materials on theories, methods and techniques for animating traditional hand-drawn effects.
For some amazing free video reference for flames, smoke, flash bursts, blood splatters, fireworks, explosions and many more, visit Detonation Films. It has a huge and impressive archive of clips to use and learn from with over 15 pages of downloads.
If there's any requests for another specific type of effect or questions about any of the steps shown above, just let me know, I'll answer questions and I might be able to whip up another Flash tutorial someday, any input would be helpful.
Coming soon... FIRE!


Suuuuuuuuuuuuuuper !!! Rone, more more more!!!
ReplyDeleteya, this was awesome. Where is that Fire one?
ReplyDelete